Installation
When You Understand What Goes Into Installing A Green Properly – You’ll Know Not To Attempt It Yourself
You can either install the green yourself, or have an experienced professional do it. We strongly recommend the latter. Some companies claim that you can install one of their greens in an afternoon. You have to understand just what is needed to properly install a realistic, beautiful and durable synthetic green.
Land Pro has 4 or 5 workers, all kinds of special equipment (including a backhoe to clear the green area and dig sand traps, gas-powered brooms to lay down the sand, a plate compactor to compact the crushed stone base, and a ride-on roller because the push rollers aren’t heavy enough to bend the fibers the right way), expertise and knowledge from installing greens since 1991, and it still takes us 1 to 3 days. How are you going to install a lasting green in a single afternoon? A word of advice from a company who has installed hundreds of greens –
Do NOT install it yourself, and here’s why:
A lot of things could go wrong when a green is installed incorrectly. First, the seams could easily come apart if they are not fused together properly. This would seriously affect any putts that roll over the separated seams. Bumps and cracks might also appear in the base, which could damage the integrity of the putting surface. If too much sand is applied, the ball will roll on the sand, not the fibers, causing it to bounce and jump. (You won’t get a true roll if the ball is rolling on sand.) When too little sand is applied, the fibers will be too long for the ball to roll in a realistic way. And if you don’t have an expert design and install your green, you won’t maximize your space or create a green that simulates real-life shots and scenarios. You just won’t be able to practice all the shots you want. Without a good design, most of your putts will be flat or straight.
Read about the process we use to install a realistic, beautiful, durable green and see if you could do it yourself.

Learn The 15 Steps Experts Use To Install A Realistic, Beautiful And Durable Green
The first thing Land Pro does is an evaluation of the topography and soil conditions of your yard. The first question we ask is, “Where’s the water going?” Then we mutually determine the location and size of the green. We will do a survey to locate the best place based on all the variables – water drainage, soil conditions, where the sprinkler lines are, safety (where are mis-hit shots going?) and also aesthetics – where it “looks good” in your yard. Then we’ll ask you what you want (expect) from your green. What kind of putts, chips, pitches and sand shots do you want to hit? Only then can we design a green that gives you the widest variety of desired shots, with the green in the optimal location.
Once we know exactly what kind of green and sand/chipping/pitching areas are involved and where the green will be located in your yard, we can begin installation.
Step 1 – Remove all grass and sod from the area where the green is going.
Step 2 – Excavate about 3 to 4 more inches of soil, leaving enough room for the base material (about 8 inches), so the synthetic green will be a little higher than the surrounding grass. We’ll stockpile this soil to finish around the green later.
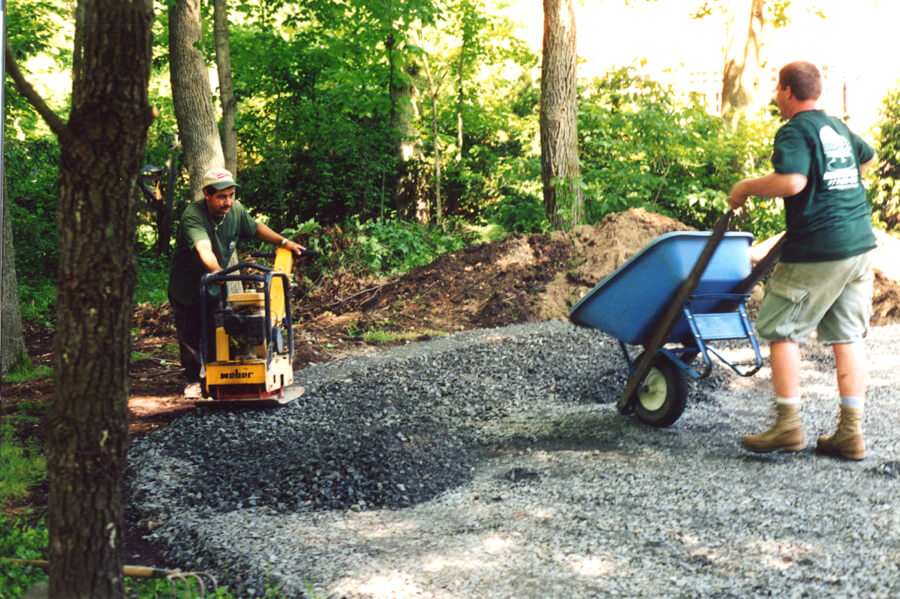
 Step 3 – We put down the base material, which is three-quarter inch crushed stone. (See the durability section to learn why we use this stone.) The crushed stone is a proven road-based material that is applied according to the undulations in the green. A dump truck or wheelbarrows are used to cart the material from the driveway to the green. Boards are always placed on the lawn to protect it.
Step 4 – Next, we compact the stones with a plate compactor that vibrates and compacts the material into position. This process not only makes the base smooth and hard like concrete, but also makes it porous for water drainage, and flexible for ground movement from the freeze and thaw cycles. It won’t crack like concrete or asphalt, and the integrity of the green remains intact.
Step 5 – Then we put the stone dust on top of the crushed stone. The stone dust is a much finer particle size, which is then compacted to make it smooth. Stone dust is the best material for the final contours, shapes and slopes of the green. It is smooth with no bumps, so the ball will roll true. Stone dust is also porous, to facilitate water drainage.
 Step 6 – Next, we install aluminum cups that are attached to a 2-foot PVC sleeve. We drill through the stone with an auger, anchoring the cups to the soil below so they won’t “sneak out” of the ground. Some companies will use concrete around the cups. Since it has been our experience that the concrete might crack, we drill down and anchor the cups to the soil below. This process holds the cups steady, without using concrete.
Step 7 – After the cups are installed, we hand-trowel the stone dust to ensure an absolutely smooth and contoured surface.
Step 8 – Next, to eliminate any unnaturally high or low bumps, we go over the stone and stone dust with a roller to make it even smoother. We want a realistic surface.
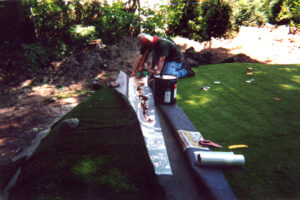
Step 9 – Now, the green turf and the fringe turf are installed which roll out like a carpet. The number of seams are minimized and joined together using Mylar tape and a solvent-based adhesive that repels water. This gluing process is done underneath the turf. When we’re done, the seams will be invisible. The tape and cement are water-repellent and will last for the life of the green. Holes are also cut in the turf, where the cups are.
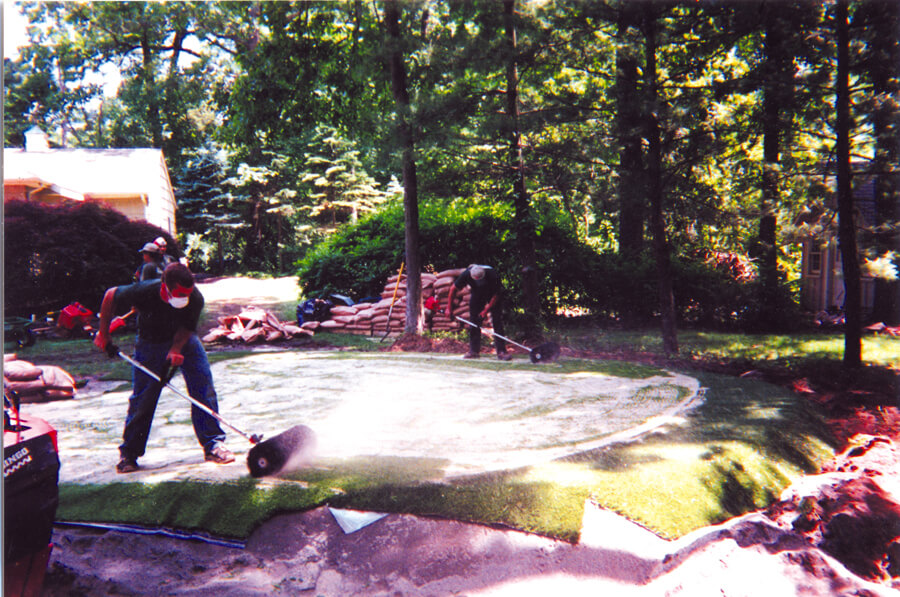
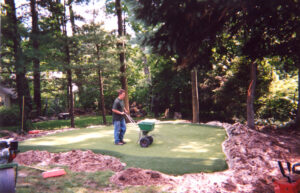
 Step 10 – Now, the top dressing sand is applied, which is a silica sand, used especially for this turf. We apply 9 pounds per square foot, to help keep the green in place. Without the sand, the fibers of the turf are laying down. As we apply the sand, we use gas-powered brooms to work the sand into the fibers. The fibers are spread out and fluffed up for a nice, natural finish. So you won’t see it, the last layer of sand is colored black and green. After all the sand is applied, one eighth of an inch of fiber is left standing straight up.
Step 11 – Next, we use the ride-on roller to bend the eighth of an inch of fiber over. A ride-on roller is used because push rollers are not heavy enough to bend the fibers properly. This bent grass is what simulates real bent grass greens. The golf ball rolls on the eighth of an inch of grass bent over, not on the sand.
Step 12 – To make sure that all of the seams are proper, we go over the entire green with a “fine-toothed comb”. Scissors are used to cut any stray pieces of fiber sticking up.
Step 13 – Next, the excavated soil is graded around the edge of the green for a finished look. The soil is raked and seeded, so grass will grow right up to the edge of the synthetic green.
Step 14 – The green is hosed down for a clean, finished look.
Step 15 – We put the flags in the cups.
The green is now completed. You can start putting.
This entire installation process takes anywhere from 1 to 3 days,
depending on the size and conformation of the green.
How We Design A Realistic and Durable Green
Evaluation of Topography and Soil
Survey to Locate Best Location
What Do You Want From Green
Some of Our Work
Having a synthetic putting green right in your backyard provides an ideal opportunity to teach your kids the game. It’s also a great way to entertain guests. Be the envy of your neighborhood. Lighting can even be installed, so you can play after dark.
View some of Land Pro Service’s custom synthetic turf putting greens.

